
Getting started with PlayWeld
Install or build the IDE, open the Control Room, and prepare your first game workspace.
On this page
PlayWeld is a desktop game development IDE built on Eclipse Theia. A local service keeps track of projects, tasks, settings, and integrations. This website supplies documentation and marketplace packages; the IDE runs on your computer.
Before you start
Choose the release or source-build instructions that match your operating system. Install your game engine separately. Unity, Unreal Engine, Godot, model providers, and authoring tools have their own setup requirements.
Use the downloads page to find release information. For source builds, follow building PlayWeld. Keep a test profile separate from important game work while learning the application.
Confirm the service connection
Launch the desktop Control Room and open Project Home. Look for Connected to platform service. If the window opens without a connection, check that the application and service use the same profile; the troubleshooting guide explains the next checks.
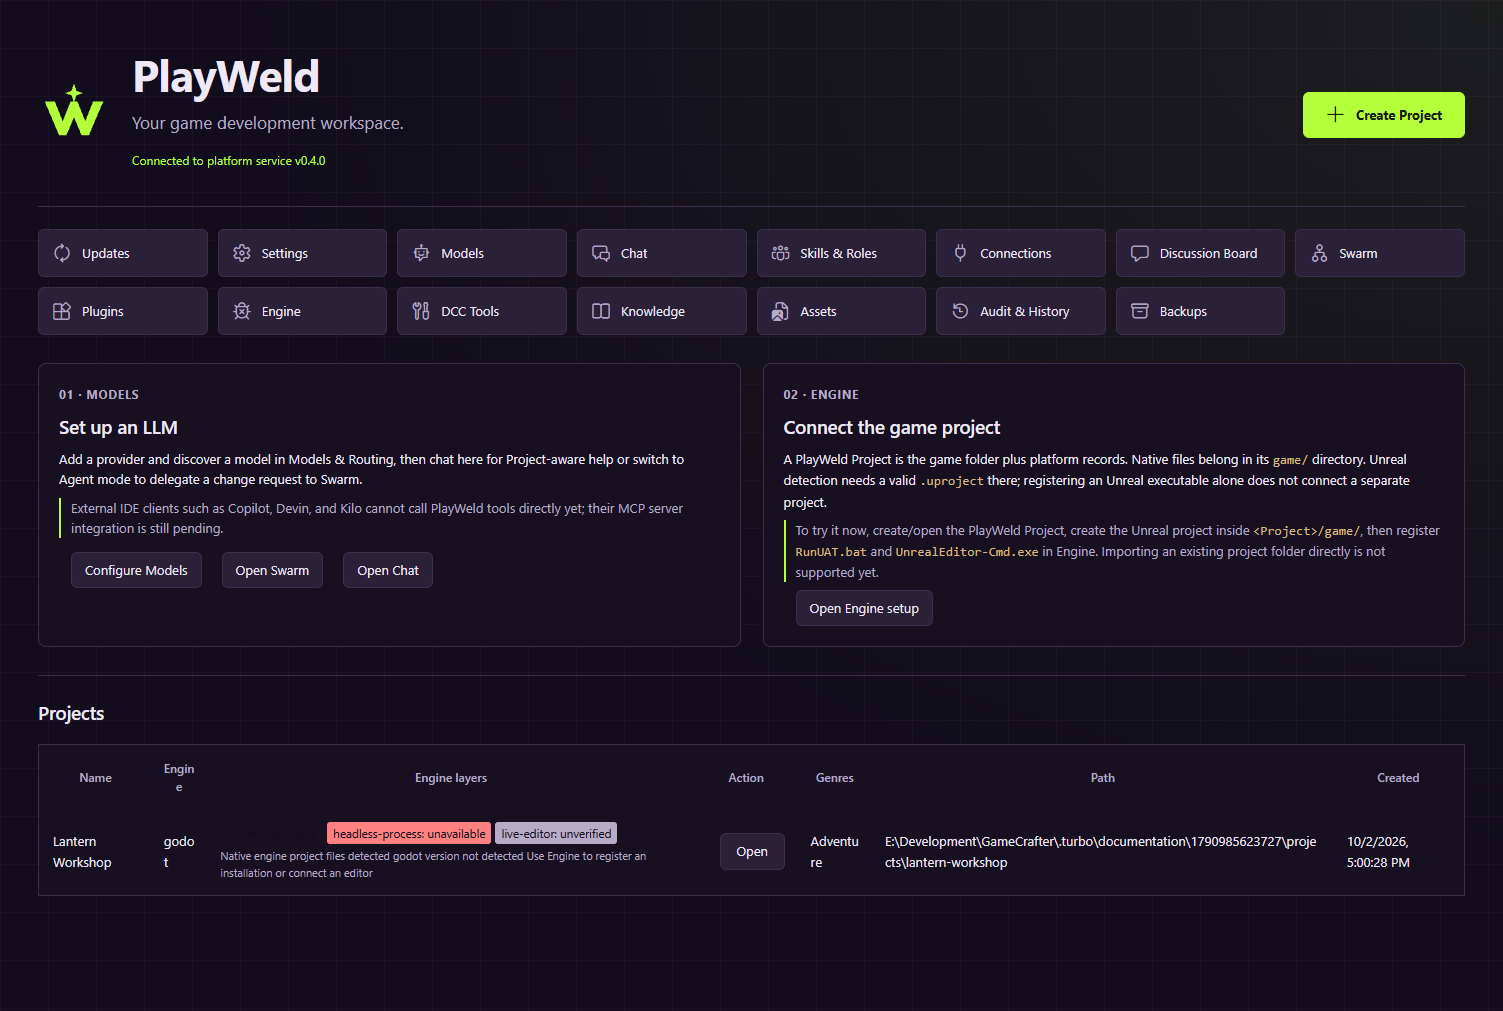
Actual development browser capture with a local service and disposable example project. Electron is the desktop application.
Create a small first project
- Choose Create Project.
- Enter the project name and description.
- Pick the engine family and genre metadata.
- Choose a parent directory and review the final confirmation.
- Open the registered project and check the selected folder.
The engine family is fixed when the project is created. Native engine content belongs in game/; design records belong in docs/. An empty game directory is a workspace, not a finished native engine project.
Choose your next step
Follow Lantern Workshop for a complete learning path. Configure models and routing before using Chat, and inspect engine capability layers before running native operations.